 Sign in
Making birds on a branch
שעת איכות
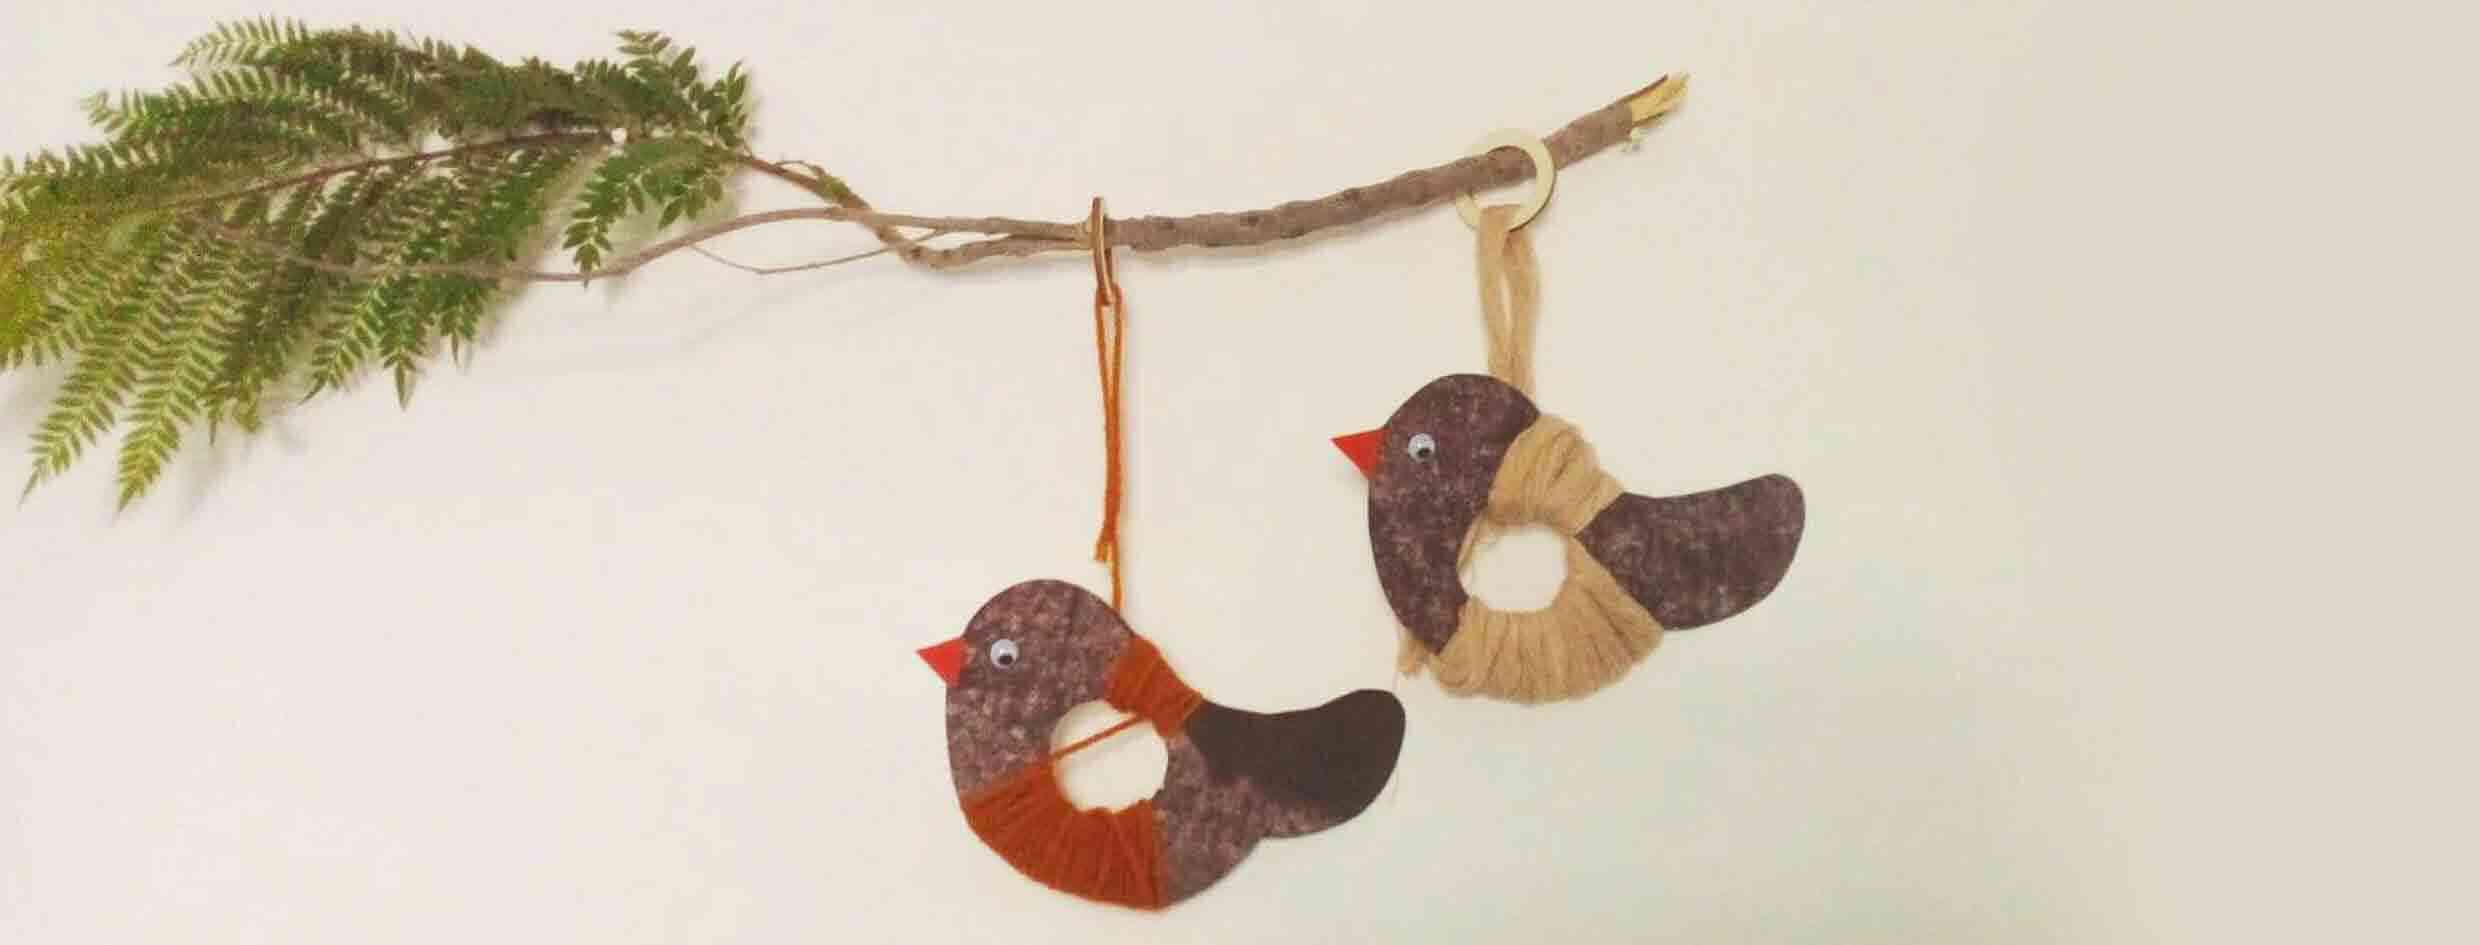
I love birds.
Not just the parakeet – the common green parrot that perches on the solar water heater of the apartment across from me.
Even little sparrows like these, the light brown ones. Their chirping warms my heart 🙂
I saw a picture of this craft on Pinterest and decided to make it. So sweet, so pretty, and it really upgrades any space.
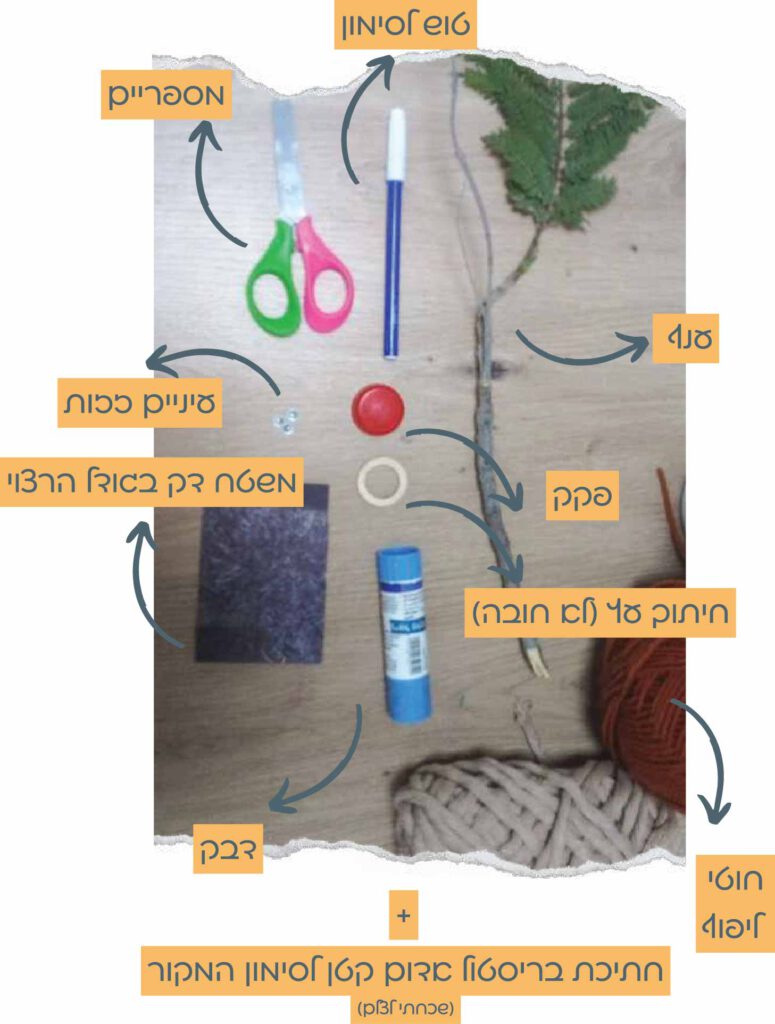
What to prepare in advance:
A base in the size you want for your bird (poster board, craft cardboard, etc.), yarn for wrapping, a small piece of red poster board, googly eyes, a branch, a bottle cap, a marker, scissors, glue, a wooden ring (optional).
Let's get started:
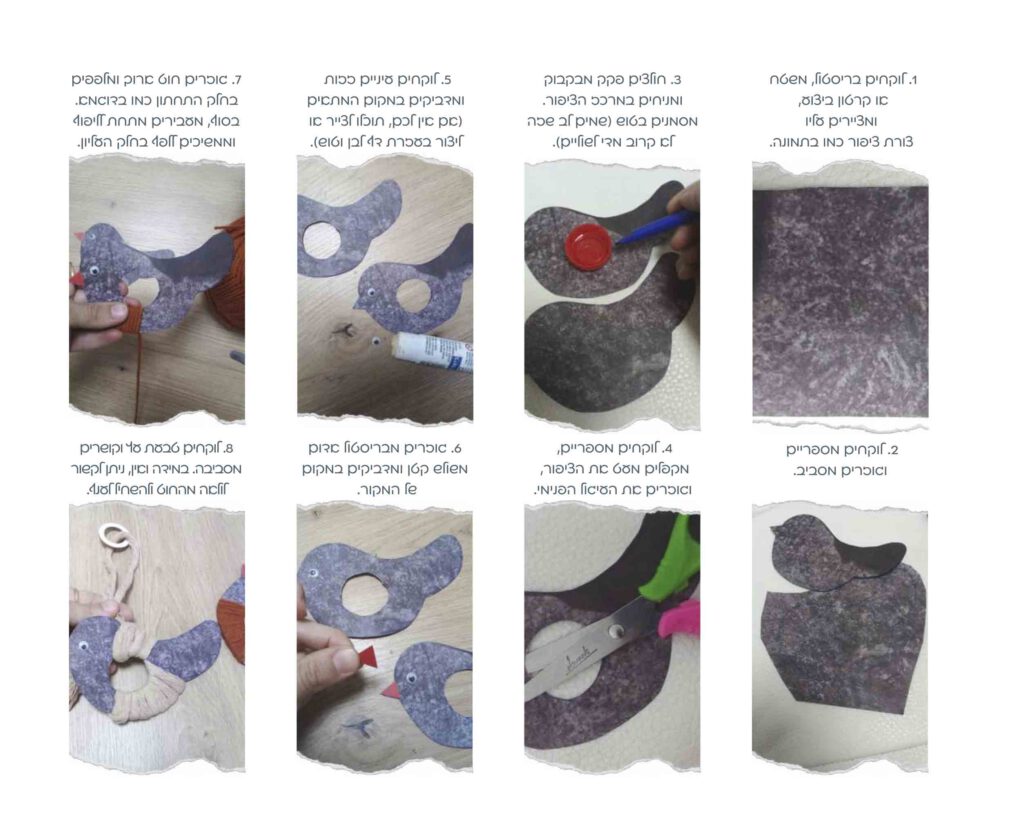
I’m writing instructions here on how I did it, and below you can see them in pictures.
- Take bristol board, a mat or cardboard and draw the shape of a bird on it – just the outline.
- Take scissors and cut around the bird.
- Take the cap off a bottle and place it in the center of the cut-out bird. Trace around it with the marker (make sure the line isn't too close to the edges).
- Take scissors, fold the bird slightly and cut out the inner circle.
- Take googly eyes and stick them in the right place (if you don’t have any, you can draw them or make them with white paper and a black marker).
- Cut a triangle out of red bristol board and stick it where the beak goes.
- Take a long piece of yarn and wrap it around the bottom part as in the picture. When you're done, move on to wrapping the top part. Leave some yarn hanging out, long enough for hanging.
- Tie the remaining string to a wooden ring; if you don’t have one, you can tie a loop from the string and slip it onto the branch.
I’d love to read whether you liked the craft.
0
Liked it